


|
StableBit CloudDrive
A secure virtual hard drive, powered by the cloud.
|
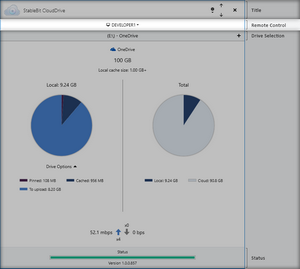
Main Window
(Build 1051)

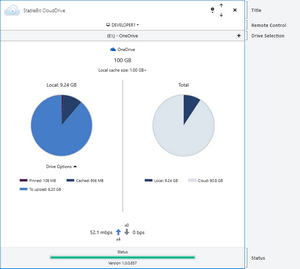
As pictured above, the main window consists of a number of parts. In addition, the window can either operate in vertical or horizontal mode.

You can easily switch between the 2 modes by resizing the window horizontally. Making it wider puts it into the horizontal mode, while making it narrower will put it into the vertical mode. It's up to you to use whichever mode suits your preference.
This manual will focus on the horizontal mode, which is similar to the vertical mode except that it shows a little more information.
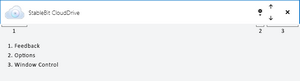

Feedback gives you information about actions that you perform in the application, and any errors that you may encountered.
Each Feedback item is color coded according to how severe the message is:

Click the X next to each feedback message in order to dismiss it. Task complete messages will be dismissed automatically after 24 hours.
Click the X with the down arrow on the feedback bar in order to dismiss all of the feedback messages.
 |
Some feedback items cannot be dismissed until the condition that is triggering them is resolved. |
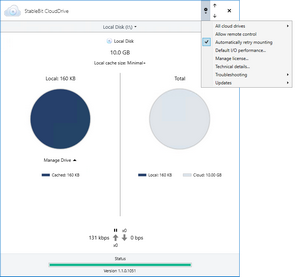
This gear lets you control application-wide settings that are not related to any specific drive.
-
All Drives
-
These settings apply to all cloud drives at the same time.
-
Pause Uploads
-
This will pause uploads on all cloud drives.

Uploading will automatically resume when data is written to a cloud drive and the cache is either running low on disk space or becomes full (when using Fixed or Proportional cache types).
-
-
-
Allow Remote Control
-
This toggles whether remote control is enabled or not. When this is unchecked, StableBit CloudDrive won't be able to make or accept any remote control connections on your local network.
See Remote Control for more information.
-
-
Automatically Retry Mounting
-
If your cloud drive cannot be mounted due to an error communicating with the storage provider, StableBit CloudDrive will periodically retry mounting your drive.
-
-
Default I/O Performance
-
This lets you to specify default I/O performance settings for all newly created cloud drives. See I/O Performance > Default I/O Performance
-
-
Manage License
-
Activate or deactivate your StableBit CloudDrive license here.
-
-
Technical Details
-
Opens up a new interface that show you a more in-depth view of how your drives are functioning. This can be used for troubleshooting purposes or if you're just curious and want to see what's going on under the hood. See Technical Details for more information.
-
-
Troubleshooting
-
The troubleshooting menu contains items that will aid you in troubleshooting any issues that you may encounter while using StableBit CloudDrive. See Troubleshooting for more information.
-
-
Updates
-
Here you can force StableBit CloudDrive to check whether a newer version is available, and enable or disable automatic update checks.
-
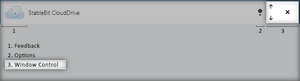
This area simply lets you minimize, maximize, or close the application.
|
The minimize / maximize buttons are not shown in the vertical UI to save space. You can still minimize and maximize the vertical UI by pressing [Windows Key] + [Up] and [Windows Key] + [Down]. |
When remote control is enabled, this bar lets you select which computer you are currently connected to. See Remote Control for more information.
When you have multiple cloud drives, this bar lets you select which drive you would like to manage. In addition, when you click the + on the right, it puts you into the New Drive tab. The new drive tab allows you to create new drives and manage existing ones that are not attached to the current computer.
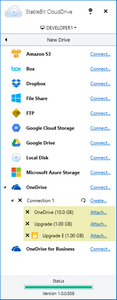
This is the new drive tab. This is where you manage your storage provider connections and any cloud drives that are not attached to the current computer.
This is also where you can create new cloud drives.
See the appropriate section in the manual for usage information:
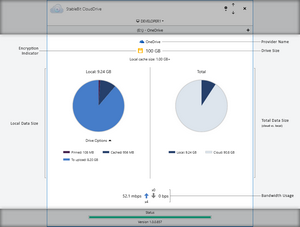
When not on the New Drive tab, you will see information displayed about an attached cloud drive. This is also where you can manage your cloud drive through the Manage Drive menu.
UI Parts:
-
Provider Name

This is the name and logo of the storage provider that is storing the data for this cloud drive. The tooltip also shows the connection name that was originally used to connect to this provider.
-
Encryption Indicator

The encryption indicator is shown if the cloud drive is encrypted. The tooltip will show details about the encryption algorithms used, the type of password used, the unlock method, and data authenticity verification.
-
Drive Size
Obfuscated:
Encrypted:
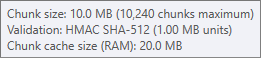
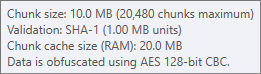
The drive size is the total size of the cloud drive. The tooltip will show details about the chunks that are used to store the drive's data, the type of validation used, chunk cache information, and whether the data is obfuscated.
All unencrypted drives are automatically obfuscated using AES 128-bit CBC.
For unencrypted drives, SHA-1 is not used as a secure hash, it simply functions as a checksum.
For encrypted drives, a much stronger algorithm is used to ensure data authenticity in addition to data integrity (HMAC SHA-512).
-
Local Cache Size
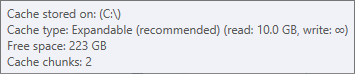
The local cache shows the set size of the local cache and whether it's allowed to expand beyond that size (the + indicates that it is). The tooltip shows which drive the local cache is stored on, the cache type, the free space on the cache drive, and how many chunks the cache is stored in.
-
Total Data Size
The total data size pie chart shows how much data is stored locally vs. the total size of the cloud drive. The tooltips over the pie slices will show exact sizes in bytes.
Prefetching tag:

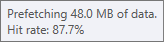
When data is being prefetched, a prefetching tag will be shown below the pie chart, as well as how much data is being prefetched as a separate pie slice. The tooltip will show the hit rate efficiency of the prefetcher (higher is better) as well as how much data is queued for prefetching.
To turn prefetching on and off, or to change its settings, see I/O Performance > Prefetcher.
Some storage providers do not support reporting the actual amount of data that is stored in the cloud. For those providers, the amount of data stored in the cloud is approximate.
-
Local Data Size
The local data size pie chart shows the breakdown of the data that is stored in the local cache. It will show how much data is pinned, how much data is cached, and how much data needs to be uploaded.
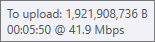
Hovering over the To Upload pie slice will show you an estimate of how much time it will take to complete the upload, given a 30 second average of the current upload speed.
If data was prefetched recently, that data will remain automatically pinned for the Prefetch Time Window and it will be shown as a separate pie slice.
To change the Prefetch Time Window see I/O Performance > Prefetcher.
-
Bandwidth Usage
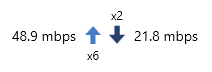
The bandwidth usage indicator shows how much upload bandwidth (up arrow) and download bandwidth (down arrow) is currently being used, as a 10 second average. Next to each arrow you will also see the number of concurrent requests that were started with the storage provider, within the last second.
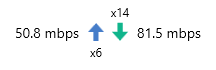
When prefetching data exclusively, the download arrow will change colors to indicate when that is happening.
If StableBit CloudDrive detects throttling by your storage provider, an icon (
 ) will be shown to indicate that.
This icon will be shown next to the down arrow if your downloads are being throttled, and next to the up arrow if your uploads are being throttled.

The status bar animates whenever StableBit CloudDrive is busy performing a task. The name of the currently running task will be shown at the top.

Hovering your mouse over the animating bar may show more details, when available.
In addition, many tasks can be aborted. Simply click the X abort button to abort the currently running task.
|
Certain important tasks, such as Resizing your Drive cannot be aborted and must run to completion successfully or fail. |
|
Most tasks that need to do some work on a cloud drive can do so in parallel on multiple cloud drives at the same time. However, some tasks, such as Detaching your Drive, can only be performed on one cloud drive at a time. |
|
Automatic Abort / Restart Internally, StableBit CloudDrive utilizes a custom designed hierarchical queue-able asynchronous task-based architecture for everything that it does in the background. The hierarchical part simply means that some tasks are more important than other tasks, and if a more important task needs to run, it will abort the less important one and restart it later after the more important task completes. A practical example of this is when you try to resize your drive while metadata pinning is running. Metadata pinning will be aborted and your resize operation will begin. After the drive is resized, metadata pinning will resume. |